
Blocks will be pieced on a muslin foundation and then trimmed to 6.5 x 9.5 inches.
- Make 80 blocks and set them 10 x 8
- Quilt finishes at 60 x 72
Muslin foundation is cut 7 x 10 inches
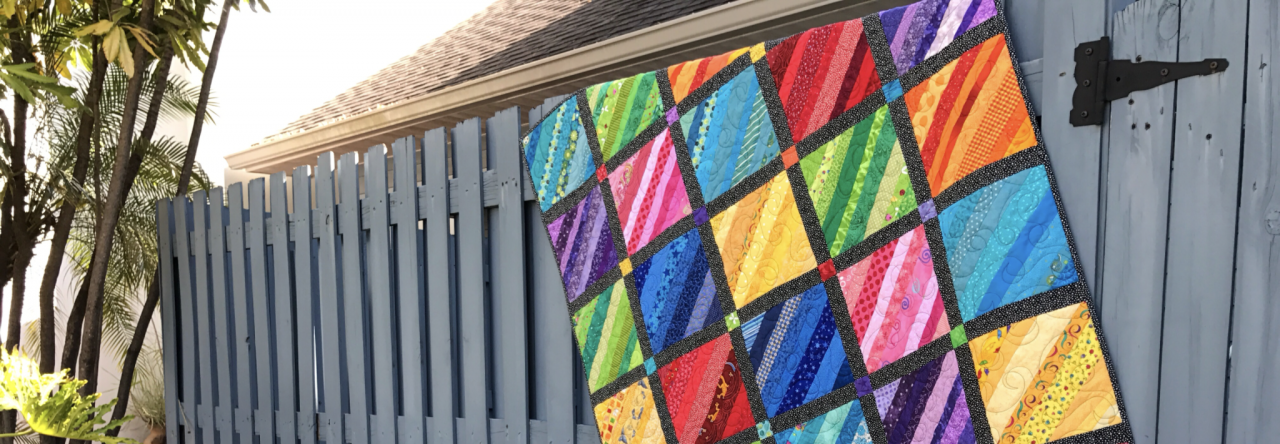
BLACK center strings should be cut 2 inches. You may use tone on tone prints but the center string should *read* as solid when you step back and look at the blocks.
The most important thing to remember with these rectangle string blocks is that you need to make mirror image blocks. That is half the blocks need to have the center string going from bottom left to top right and the other half of the blocks need the center string going from top left to bottom right.
The easiest way to accomplish this is to start blocks in sets of two as shown below.
Sew a string to either side of the center and press open.

From this point, I sew a strip to both sides of the block before getting up to press and I make blocks in groups of 8-10 at a time. You can make fewer or more – whatever works best for you.

When I get to the corners I use an oversized triangle or a wide strip to avoid having tiny pieces on the corners. Remember these blocks are going to be trimmed down and it’s easier on those assembling them.

If I get to a corner and just have a small section of the foundation to be covered, I’ll frequently use an oversize piece as shown below and then trim the string underneath being careful not to cut the foundation.

Here my foundation is completely covered with strings and I’m ready to square up the block.

I always trim my blocks from the back and first I trim about 1/4 off the right side and top and then flip the block around and trim the remaining two sides leaving the block at exactly 6.5 x 9.5 inches as shown below.

Here’s my finished block.

Here’s a smaller version with borders
- Make 36 blocks and set them 6 x 6
- Cut an inner border 2 inches
- Cut an outer border 5.5 inches
- Quilt will finish at 49 x 67


Hi Mary,
I am sorry you have to recreate your blog. What a nightmare.
Are you going to repost the pink and brown quilt you were working on? I love that quilt and am thinking of making it.
Cindy in Seattle
LikeLiked by 1 person
Mary, the black center string makes the rest of the strips POP! As always, your quilts are beautiful! Thanks for the new project.
LikeLiked by 1 person
Count me it for some blocks. May
LikeLike
What a beautiful variation on the 9″ square. I can’t wait to get started! Another great special project, Mary!
Sheree
LikeLike
Thank you for your easy lesson!! I love such blocks!
LikeLike
Thanks for another clear tutorial. I’ll be making some blocks to send, and some to donate to WTIL.
LikeLike
Pingback: HeartStrings Sew-in
Love to make some of those blocks! I’ll send you some in September!
LikeLike
Pingback: Sew-in at Roberts, WI
Pingback: Labor Day Weekend sew-in
I’m thinking I’m in for part of the weekend at least. The stockings are finished; the cool ties are almost, so I’m in need of a quick satisfying project.
LikeLike
Pingback: Quilt along with us this weekend
Pingback: Are you participating?
I finished my first heart string top. This top goes fast at you have no matching involved
LikeLike
Pingback: String Diamonds
Pingback: String Quilt Inspiration
Pingback: diamond strings
What an amazing site. So many beautiful quilts. A visual feast
LikeLike
I would like to see more and know more…. I could sew up some blocks and donate back to be included in with other block. (black strip in the middle. I would only sew 4 – 6 blocks at a time.
please include me into your group.
LikeLike
I’m going to make this Quilt. I love it. photo 2 . I’ve been cutting the material to make it already. thanks for the inspiration! This is also my first quilt but my quilting aunt has back and says I can do it. I hope mine turns out half as nice as yours did.
LikeLike
Just found your site. Newbie to quilting. You have quite a gift.
LikeLike
I am a beginner quilter. Your site has helped me many, many times and reduced the anxiety experienced with new techniques and projects. Thank you.
LikeLike
Thanks Mary for posting these, I shared your site on my blog Layers of Hope/Quilting 911 @layersofhopequilting911.blogspot.com after one of my readers saw I had posted about your Quilt-it today piece. She let me know about your site because I was so excited to see how you and others are reaching out, I posted prior to finishing the article!
LikeLike