
I’m not writing up a complete set of instructions but will share some information about my Solid Stars and Strings quilt that I’ve just started. It’s based on an antique quilt I saw a while back that caught my eye.
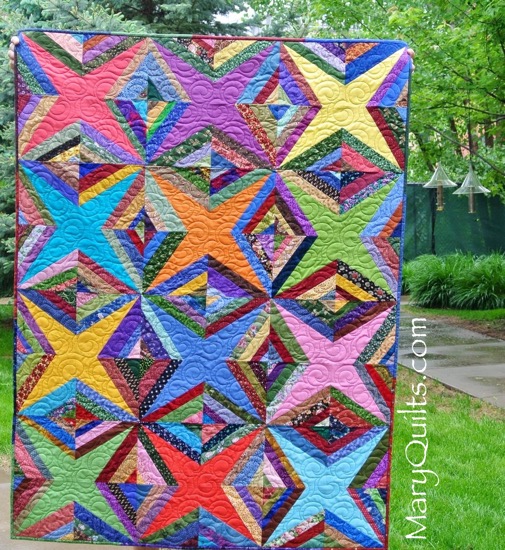
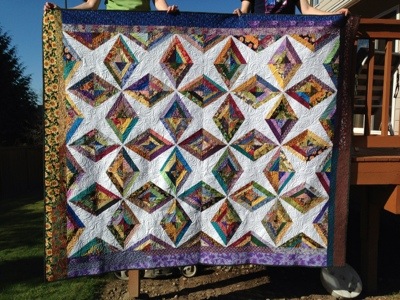
Here is my finished quilt. I decided to go with 12 blocks and no border which makes a nice size lap quilt (48 x 64) for donation.
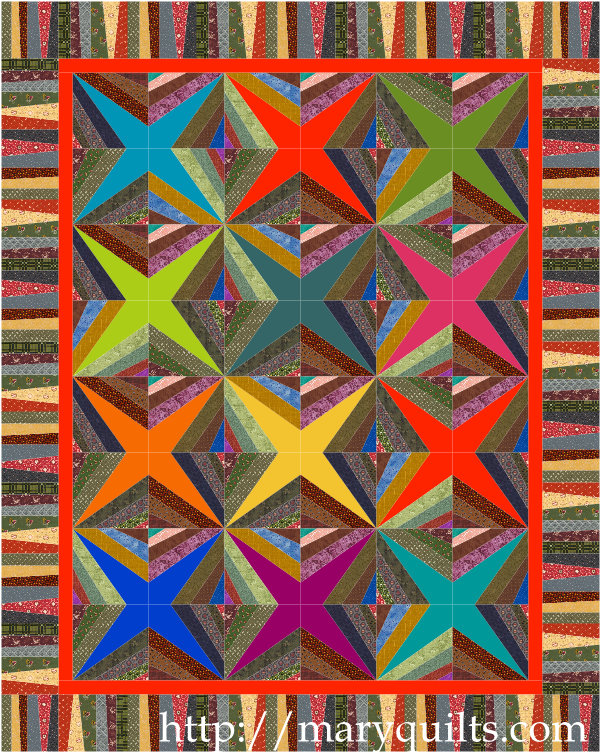
Here’s my original EQ7 drawing which does have borders.
Inner border would be cut 1.5 inches
Outer piano key border would have strips of various widths and be trimmed to 5.5 inches
Quilt size would be 61 x 77
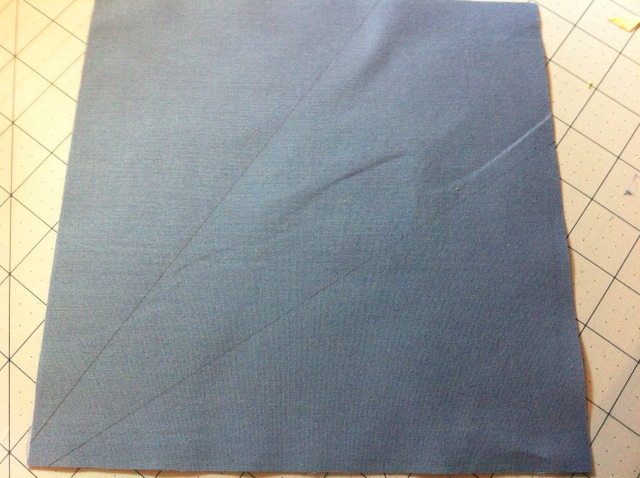
For each block, I cut 4 solid squares 8.5 inches. Star blocks will finish at 16 inches (16.5 with seam allowances)
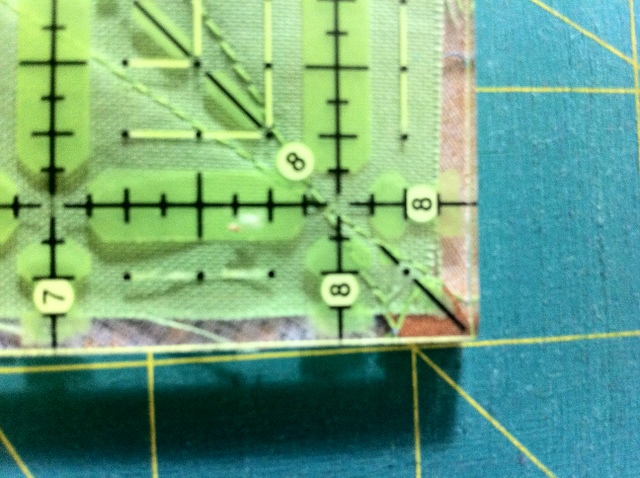
I mark two fabric placement lines on the squares 3 inches in from the top left corner to about 1/4 inch from the bottom right corner. I just use my mat to line up my ruler, I don’t worry about being exact.


I use a pen to mark the lines so they’re easy to see – they’ll be covered by the first string.
The first string is placed face down against either line and sewn with 1/4 seam as usual.
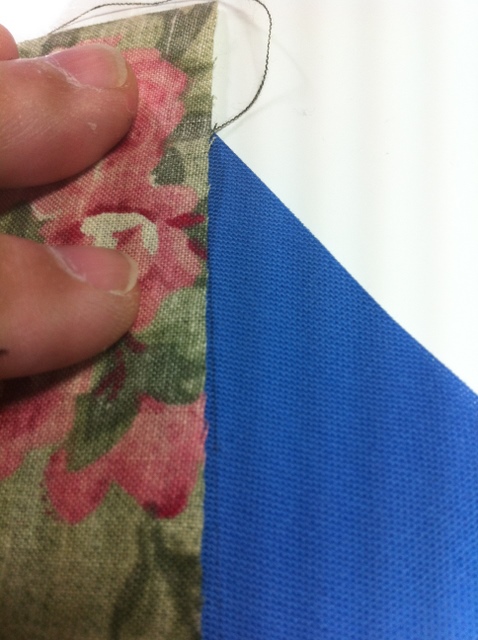
Continue adding strings on both sides, pressing between each round until the foundation is covered. I trim these from the back, lining my ruler up in the top left corner where there are no strings.

My foundation square pulled up a little with sewing but I’m going to square to 8.5 inches NOT to the foundation square. If you wanted to you could start with a larger foundation but I just made sure my strings extended about a 1/2 inch beyond my foundation so that when I trimmed my block I would have a full 8.5 inches even if the foundation pulled up.
Sew 4 blocks together to form the star as shown in the quilt diagram at the top of the page. Press seams open to decrease bulk. This is really important because when you start assembling the top – there’s a LOT of bulk where the points of the stars come together.

Piece all 12 stars and then assemble top as shown in photo above – three blocks across and four blocks down. Add borders if desired. Quilt can be made larger by adding either borders or an additional row of blocks horizontally and vertically.
© Mary Johnson 2012 – MaryQuilts.com
Colleen’s Solid Stars and Strings
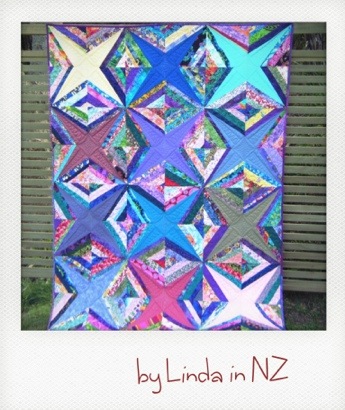
Here are two made by Dawn … I love her colors!

© Mary Johnson 2012 – MaryQuilts.com

Love, love, love these! Your instructions are great……a definite on my to do list! Thanks!
LikeLike
Thanks, Mary for the instructions. It answers all my questions.
LikeLike
Thanks Mary. I just couldn’t find it on the web site– as I wasn’t sure what it was called. Very good instructions– that explains the block perfectly. What fun!
LikeLike
Thanks Mary for the instructions. That is a fabulous looking quilt. You are so talented with the EQ7 program.
LikeLike
Solid, colored foundation squares. LOVE IT! Thank you for sharing.
LikeLike
Love this, Mary! I was wondering how in the world you were creating that look! Awesome! Thanks for answering that question.
LikeLike
Wow, Mary, these are great! So far they are my favorite of all your string quilts. Thank you so much for your generosity in sharing how they are done. I will definitely be making this quilt.
Hugs and smiles, Linda
LikeLike
these are fantastic. Just love the look of this blog and quilt. Gonna have to find time to make one of these and maybe keep it for myself! Who am I kidding, I never keep my quilts :0 JUst love it.
LikeLike
I really love this. Beautiful!
LikeLike
Another to add to my list of quilts to finish…before I die! At this rate, Mary, I’m going to have to live to 150 to catch up to you.
LikeLike
Pingback: Variations
Thanks for the link to the instructions. Now I see how you get your shape. They really are striking. K-
LikeLike
Thanks for another terrific tutorial! This is right up there with the hearts string quilt.
LikeLike
Awesome pattern and great directions, I am going to use up all my fabric in this lifetime and this is another great pattern. Thank you so very much
LikeLike
I believe this is also called Rocky Road to Kansas.
LikeLike
Oh Mary. I cannot believe I missed this before. I love it. I am very drawn to string quilts they take the stress out of trying to decide what goes with what. Thank you for sharing x
LikeLike
I am a retired librarian and active quilter. I was very interested in your reading list. I love Deana Leon stories – I want to go to Venice. I want to try your string star. Love the idea of each star is a different color
LikeLike
Your quilt is very pretty. I have made several the same way but I go one strp more and add a piece of batting and a backing square and sew them all together. When each squARE IS FINISHED IT IS READY TO PUT TOGETHER AND NO MORE WORK IS NEEDED. mAKING STRING SQUARES IS TRULY RELAXING AND THE RESULTS ALWAYS GR4QT.
LikeLike
The use of solid colors makes a scrap quilt look less busy. Brilliant
LikeLike
Haven’t visited your site in a while, but was really taken with these quilts! Especially love Dawn’s colourways. I see one of these in my quilty future, so thanks for your instructions 🙂
LikeLike
Have got this in my to do list very soon. Wonderful instuctions,Thanks so much.
LikeLike
What is the length and with of the strings used? Does muslin hold up well as background fabric?
Thank you,
Britt
LikeLike
Love those star string quilts. Would make a great quilt of valor. Can’t wait to get started on one in patriotic fabrics. Am on a roll sewing on bindings. Will do a scrappy binding on my current quilt that I am making to see how I like it.
LikeLike
I made this quilt for the charity I sew for. Everyone loved it and I gave two of the gals your web site to find your terrific directions. I’m making another one next week!
LikeLike
I can’t figure out where to draw the lines on the fabric to make the stars . love the quilt can you help
LikeLike
Please tell me what size you cut your strings for this quilt.
Thanks so much
LikeLike